Sourdough Simplified: Rustic Country Loaf

why sourdough simplified?
When I began my sourdough journey over 2 years ago, I was completely overwhelmed. Sourdough seems to be one of those things where everyone has their own method and each method is different, but they all seem to work just the same. It’s confusing to know where to start and who to listen to.
When I cultivated my first starter, it felt like a success! However I had no idea what to do with it next, and I didn’t have a bread recipe. I spent hours upon hours reading different methods and recipes and ended up incredibly frustrated.
I didn’t want to bake a fancy artisan loaf. I didn’t want to buy a kitchen scale or a banneton basket. If Ma Ingalls could make sourdough without a kitchen scale, so could I. (One of the biggest pieces of advice I see amongst sourdough circles is to invest in a good kitchen scale. You certainly can if you’d like, but it’s not absolutely necessary.) I wanted to use my measuring cups and the tools I already had. I also wanted a simple method of keeping and feeding my sourdough starter that didn’t create a lot of excess discard.
After much trial and error I’m at the place where I am pretty confident in my sourdough making. My loaves are not professional by any means, but they are exceptionally frugal to make, traditionally fermented and easy to digest, and taste delicious!
I started my “Sourdough Simplified” series to share my methods and tips I’ve learned along the way. This is not the only way to do things by any means. But it’s one way, and I do find it to be much simpler than some of the methods I’ve come across. Keeping the breadbox full shouldn’t be a task that takes a lot of time or effort. It should be—simple.

In the second post of this series I am sharing my basic bread recipe that I’ve been using from the very get go. I don’t use a scale, just good ole fashioned measuring cups. I’ll be honest, I’m at the point in my bread making where I don’t measure anything except the salt and the water. Dollop in a little starter, add in more flour until it reaches the consistency I know from sight and from touch, and we’re good to go. That’s because I’ve been making this recipe for over 2 years and I know it like the back of my hand. You’ll get there too.
It will take some time to learn what proper hydration looks like, how different weather and different seasons requires more or less flour. Practice, practice, practice! Don’t be afraid to make “ugly” loaves at first. As long as you didn’t forget the salt or bake it to oblivion, it’s going to be edible no matter what it looks like. Plus, the goal is not an “instagram worthy” loaf, the goal is a frugal, digestible, delicious loaf that feeds the family.
This recipe yields one loaf. Let’s dive in!

what you need:
1/4 cup of active, bubbly sourdough starter
1 1/3 cup of filtered water (room temp or slightly warm)
3 1/2-4 cups of organic unbleached, unbromated all-purpose flour
1 1/2 teaspoons of sea salt
Dutch oven
baker’s schedule
day 1:
MORNING: The morning before baking, I wake up, remove my starter from the fridge, and give it a generous feeding.
EVENING: Early evening of that same day, I begin my dough. I like to do this earlier rather than later so I have a few hours to stretch-and-fold the dough before I hit the hay for the night.
NIGHT: Leaving my dough covered with either a plate or a wet tea towel, I let it ferment overnight. By the time I wake up on the second morning, it is doubled in size and ready to go.
day 2:
MORNING: As soon as I wake up, I laminate the dough, shape it, and proof it. I let it proof while I enjoy my coffee and morning devotions, or if I need more time before baking, I put it in the fridge for a few hours to bake later in the day.
I then bake, cool, store in a breadbox, and enjoy throughout the week!
Keep in mind that during the summer when the house is really hot, this bakers schedule is more compact because the heat causes everything to rise faster, both the starter and the dough.

to make
step 1:
Begin by feeding your starter a few hours before making the bread. You want your starter to be active and bubbly for this recipe. Like I mentioned in the Baker’s Schedule, this will depend on the temperature of your home. In the winter we keep our heat on pretty low, so my starter will take all day to double. I will feed it in the morning to use in the evening. But in the summer we rarely use the air conditioning, so my starter only takes a few hours to double. I will feed it in the afternoon to use in the evening. This is something you’ll only get the hang of through experience.
step 2:
Once the starter has doubled, in a stand mixer with a dough hook or in a bowl by hand (a danish dough whisk is great for this step!), combine your active sourdough starter, water, and about 1 cup of the flour.
step 3:
Begin mixing to combine, adding more flour a little at a time. You may need more or less than 3 1/2 cups depending on how hydrated your starter is, as well as the weather, so add slowly. Add in your salt at this time too. Continue mixing for about 5 minutes until it forms a rough shaggy dough. The dough may seem a little too wet, but it will come together in the next step.
step 4:
Place the dough in a clean oiled bowl and cover with a wet tea towel. After 15 minutes, return to your dough to give it a stretch and fold, like this. To do this, simply take one corner, stretch upwards and fold. Repeat with all corners until a new ball is formed. Continue stretching and folding every 15 minutes for the next hour. Stretching and folding strengthens the gluten strands in the dough and gives you those perfect little bubbles in the bread after it’s baked.
step 5:
You will notice that after a few stretch-and-folds, your dough is now smooth and no longer a rough dough. Form it into a final ball and leave it seam side down in your oiled bowl. You will now leave the dough to bulk ferment. It is during this time that it will get light, airy, and active, doubling in size. In the winter time when it's cold, I will bulk ferment the dough overnight, but in the summer when it's hot I give it a shorter ferment time during the day. You are going to get the best taste between 7-12 hours ferment time. Aside from maybe a few times I have over-fermented my dough, I almost never make a sour loaf. While different from yeast bread, it is more of a depth of flavor rather than a sourness. If you want super sour sourdough, you’ll want to use starter that has been sitting for longer.
step 6:
After the bulk ferment, your dough should be doubled in size with strong gluten strands. Turn the dough from the bowl onto an unfloured surface and laminate the dough, like this. Then, shape into a ball and build tension by pushing it towards you and then away, like this.
step 7:
Place the ball seam side up in a lightly floured banneton basket or simply a towel-lined bowl that has been generously sprinkled with flour. Like I mentioned, I keep things simple when it comes to my sourdough, so I’ve yet to purchase a banneton basket (mainly because I haven’t been able to find one that is guaranteed grown without chemicals). I just use an antique wooden bowl that I have and a linen towel as you can see below. It works great!

step 8:
Allow to proof for 30-60 minutes on the countertop or for a few hours in the fridge. If you press the dough with your finger and the dent fills in quickly, it needs more time to proof. But if it fills in slowly and leaves a small indent, it is ready to bake. Preheat your oven to 425°F when it’s ready to go and allow your dutch oven to heat up in the oven.
step 9:
Place the dough ball seam side down on a piece of parchment paper and score the dough using a sharp knife or bread lame. Lift the parchment and place the dough into the hot dutch oven, carefully so as not to burn yourself, and put the lid back on and place it in the oven.
step 10:
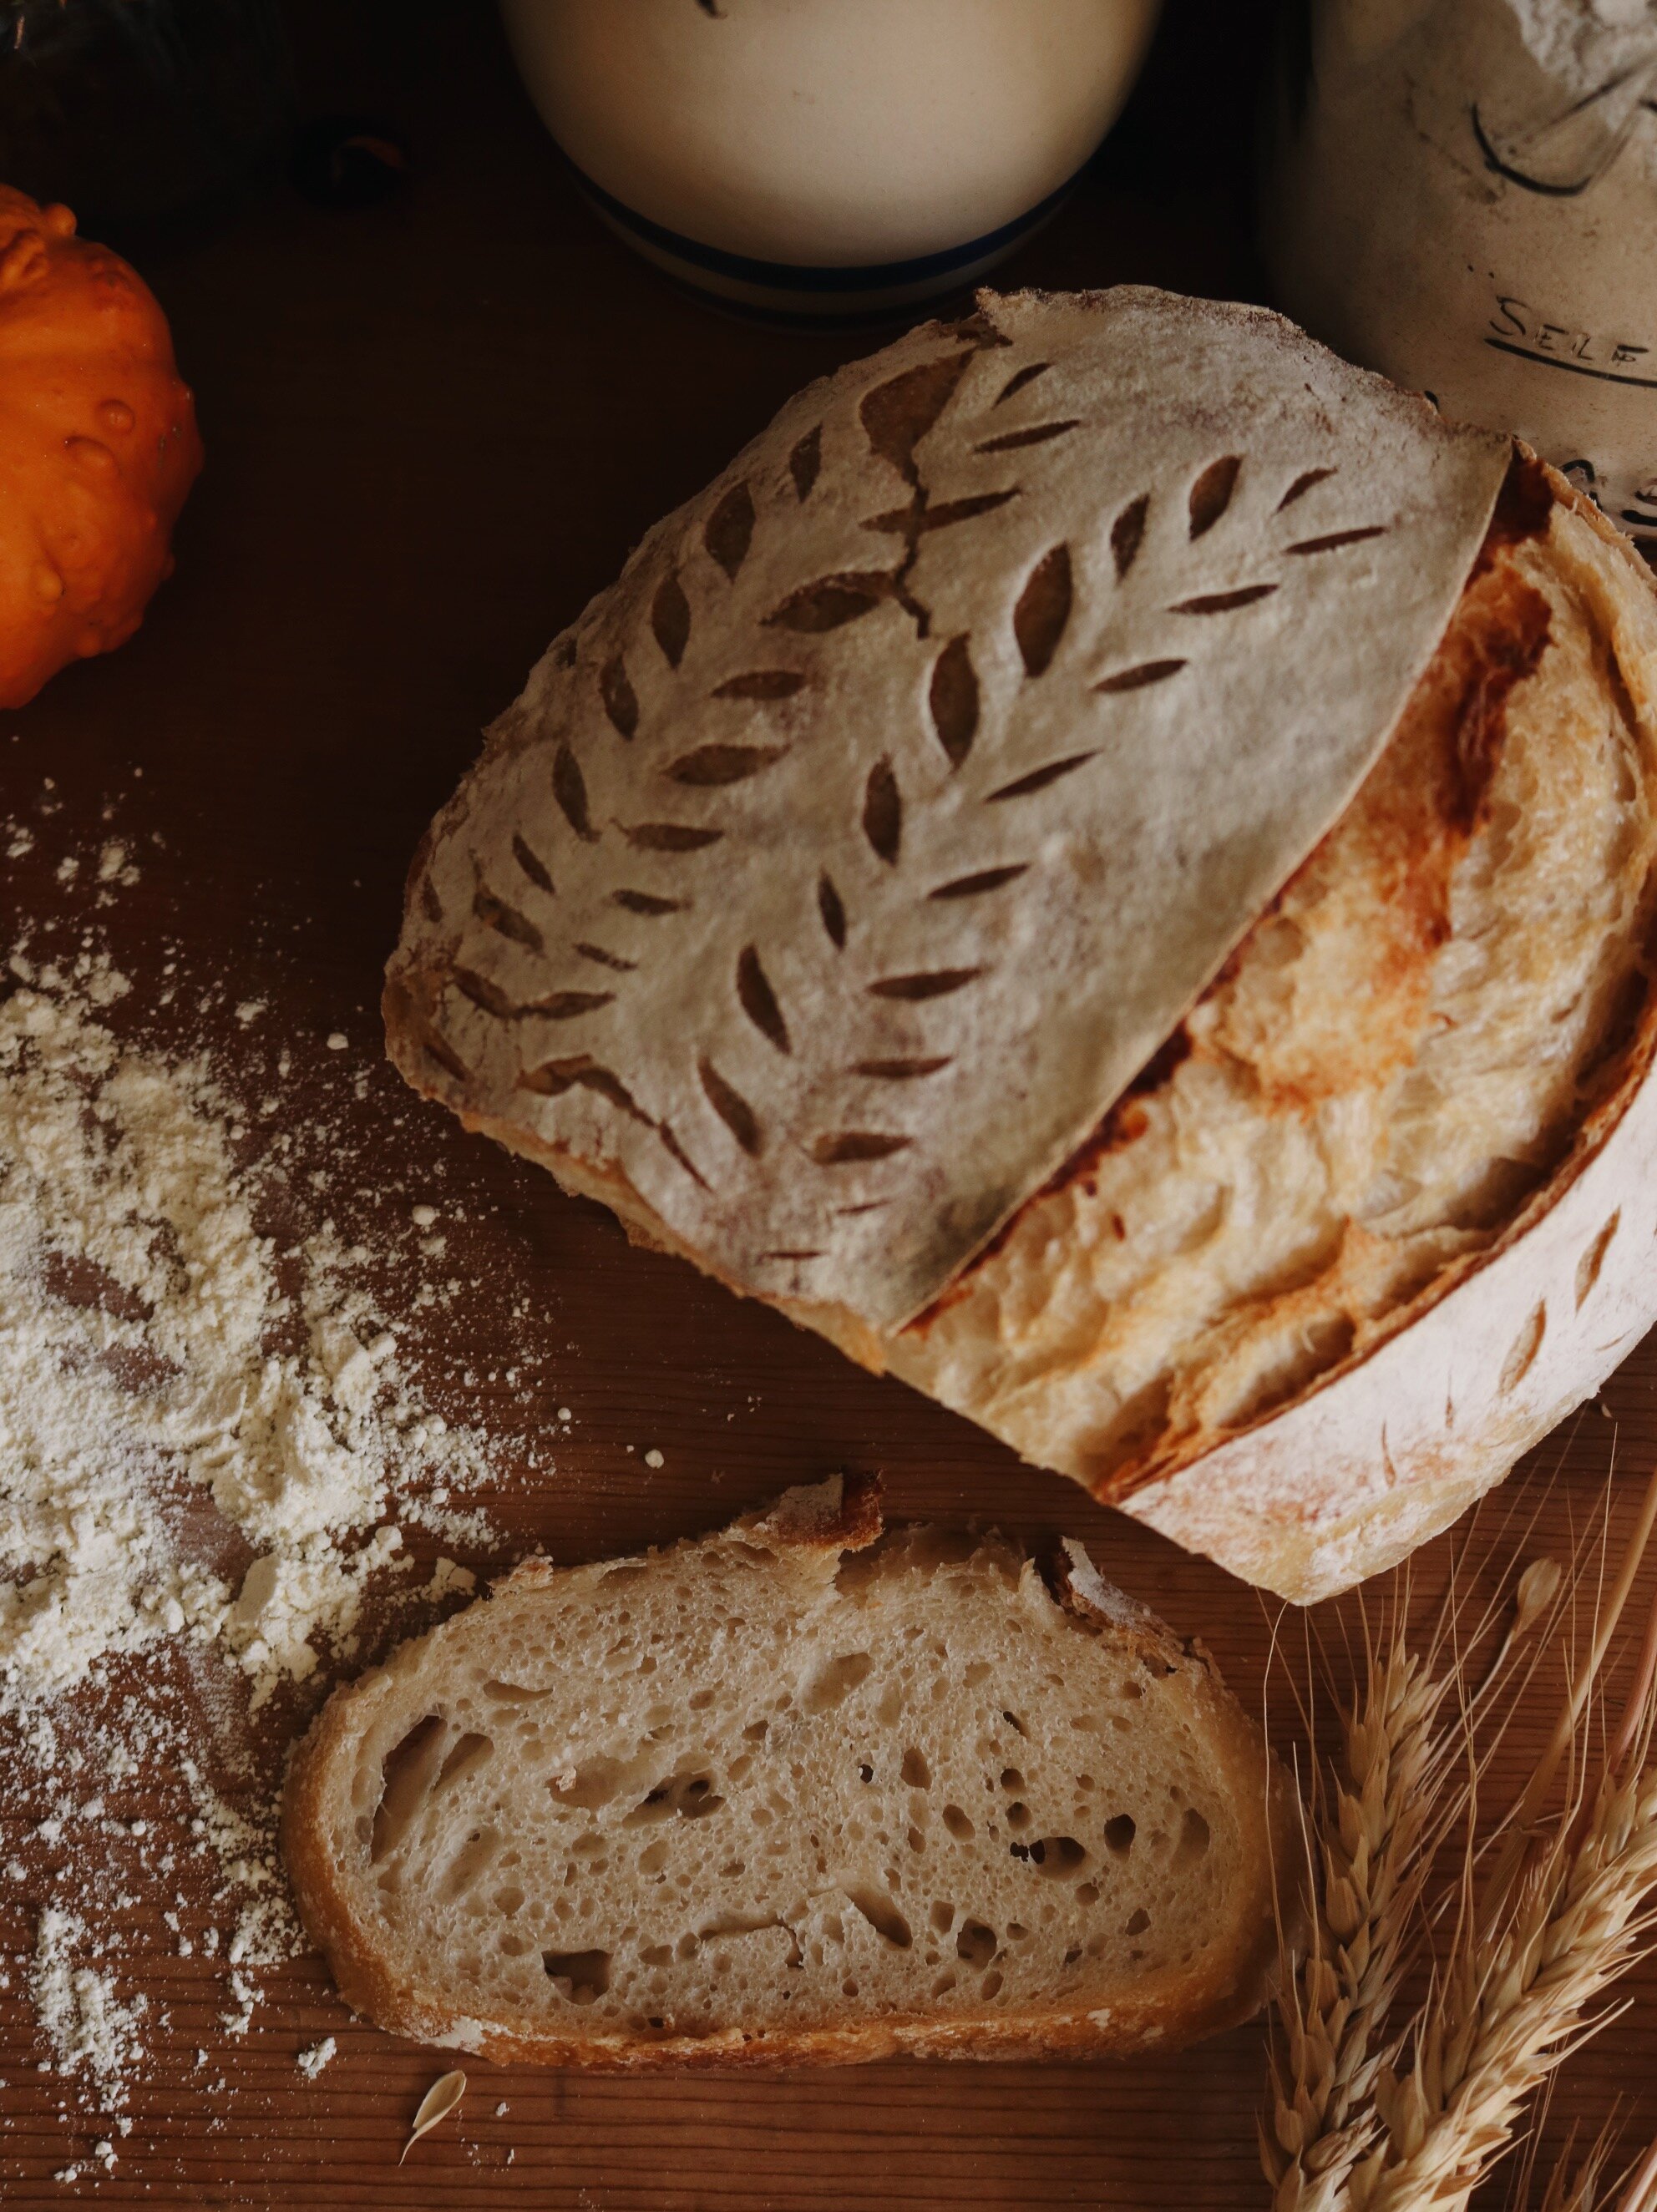
Bake for 20 minutes with the lid on and then 30 minutes without the lid. Remove from the oven and cool on a cooling rack for at least an hour before diving in. This is such an important step, as bread continues to bake once it is removed from the oven and will ensure the best crumb if cooled completely. Store in a breadbox for fresh keeping.

That’s that! How did it turn out for you? What questions do you have?
I will be continuing Sourdough Simplified in future posts, sharing more about why I choose sourdough over commercial yeast breads, different methods of proofing, baker’s schedules, and my go-to basic recipes like sandwich bread next.
Until next time, happy baking!
“Blessed shall be your basket and
your kneading bowl.”
more sourdough simplified…