Sourdough Simplified: Pumpkin Cloverleaf Rolls

why sourdough simplified?
When I began my sourdough journey over 4 years ago, I was completely overwhelmed. Sourdough seems to be one of those things where everyone has their own method and each method is different, but they all seem to work just the same. It’s confusing to know where to start and who to listen to.
When I cultivated my first starter, it felt like a success! However I had no idea what to do with it next, and I didn’t have a bread recipe. I spent hours upon hours reading different methods and recipes and ended up incredibly frustrated.
I didn’t want to bake a fancy artisan loaf. I didn’t want to buy a kitchen scale or a banneton basket. If Ma Ingalls could make sourdough without a kitchen scale, so could I. (One of the biggest pieces of advice I see amongst sourdough circles is to invest in a good kitchen scale. You certainly can if you’d like, but it’s not absolutely necessary.) I wanted to use my measuring cups and the tools I already had. I also wanted a simple method of keeping and feeding my sourdough starter that didn’t create a lot of excess discard.
After much trial and error I’m at the place where I am pretty confident in my sourdough making. My loaves are not professional by any means, but they are exceptionally frugal to make, traditionally fermented therefore easy to digest, and taste delicious!
I started my “Sourdough Simplified” series to share my methods and tips I’ve learned along the way. This is not the only way to do things by any means. But it’s one way, and I do find it to be much simpler than some of the methods I’ve come across. Keeping the breadbox full shouldn’t be a task that takes a lot of time or effort. It should be—simple.

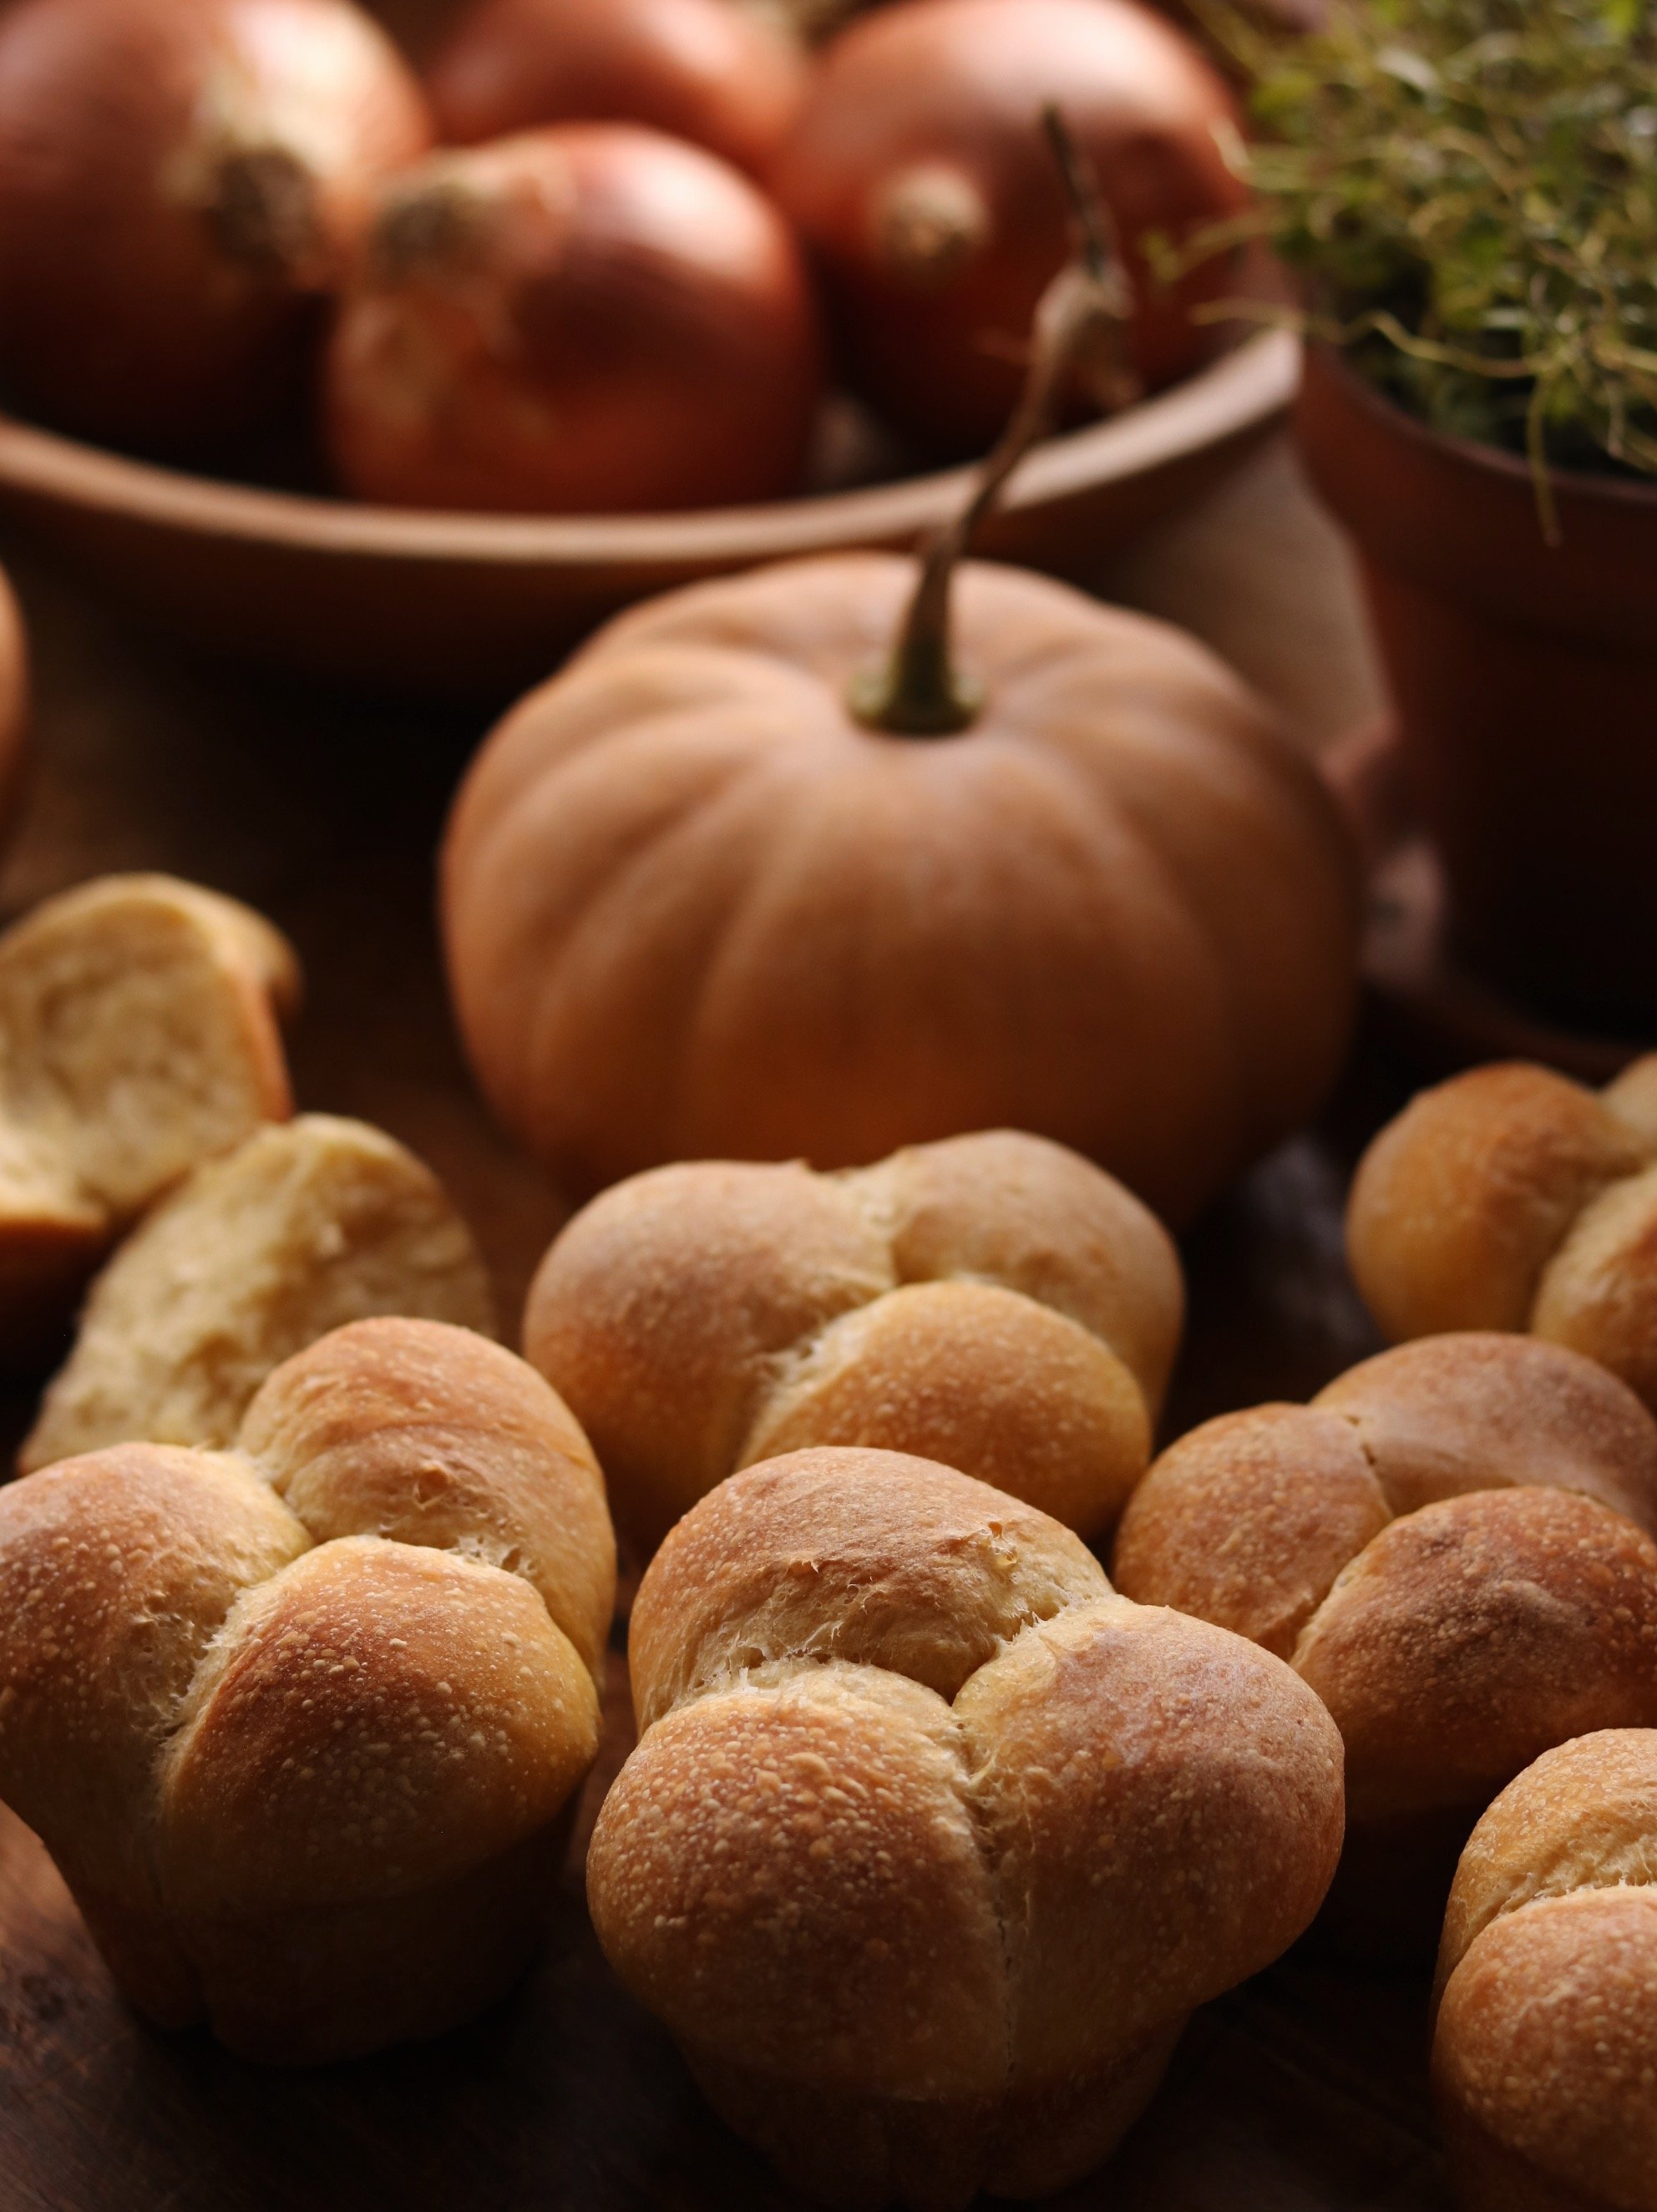
In the fourth post of this series I am sharing my Pumpkin Clover Leaf Roll recipe. The pumpkin puree adds moisture to these rolls making them soft and buttery yellow. Baking them in a muffin pan gives them a slightly crispy exterior while being delightfully soft and fluffy on the inside! This recipe yields 12 rolls.


what you need:
1/2 cup of active, bubbly sourdough starter
1/2 cup of pumpkin/squash puree
1/2 cup of filtered water (room temp or slightly warm)
2 tablespoons of local honey
1 tablespoons of avocado oil or melted butter
2 1/2-3 cups of unbleached all-purpose flour
1 1/2 teaspoons of sea salt
Muffin pan for baking
baker’s schedule
day 1:
MORNING: The morning before baking, I wake up, remove my starter from the fridge, and give it a generous feeding.
EVENING: Early evening of that same day, I begin my dough.
NIGHT: Leaving my dough covered with either a plate or lid, I let it ferment overnight. By the time I wake up on day 2, it is doubled in size and ready to go.
day 2:
MORNING: As soon as I wake up, I divide the dough, shape into balls, place in the muffin tin and allow to double in size.
EVENING: Depending on how hot or cold my kitchen is, the rolls are ready to bake by lunch or dinner. I then bake, cool, store in a breadbox, and enjoy!
Keep in mind that during the summer when the house is really hot, this bakers schedule is more compact because the heat causes everything to rise faster, both the starter and the dough.

to make
step 1:
Begin by feeding your starter a few hours before making the bread. You want the starter to be active and bubbly for this recipe. Like I mentioned in the Baker’s Schedule, this will depend on the temperature of your home. In the winter we keep our heat on pretty low, so my starter will take all day to double. I will feed it in the morning to use in the evening. But in the summer we rarely use the air conditioning, so my starter only takes a few hours to double. I will feed it in the afternoon to use in the evening. This is something you’ll get the hang of through experience.
step 2:
Once the starter has doubled, in a stand mixer with a dough hook or in a bowl by hand (a danish dough whisk is great for this step!), combine your active sourdough starter, water, pumpkin puree, honey, and oil and mix until combined.
step 3:
Add in the flour a little at a time. You may need more or less than 2 1/2 cups depending on how hydrated your starter and pumpkin puree are, as well as the humidity of your home, so add slowly. You can always add more, but you can’t take any out! Add in the salt at this time. Continue mixing for about 5 minutes until it begins to come away from the edge of the bowl. You want the dough to be smooth and tacky, but not sticky.
step 4:
Place the dough in a clean oiled bowl and cover with a wet tea towel. You will now leave the dough to bulk ferment. It is during this time that it will get light, airy, and active, doubling in size. Typically I’ll do about 6-8 hours for the first rise in the summer, and more like 12 in the winter.
step 5:
After the bulk ferment, your dough should be doubled in size with strong gluten strands. Turn the dough from the bowl onto an unfloured surface and divide into 36 pieces. Form each piece into a ball and build tension by cupping them in your hand and rolling against the unfloured counter.
step 6:
In a greased muffin tray, place 3 dough balls in each cup.
step 7:
Cover with a damp tea towel and set aside for the second rise.


step 8:
Allow the dough to rise until each muffin is over the lip of the pan by an inch or two. This will take an hour to a couple hours depending on the time of the year and how humid/hot the house is. Once you see the rolls are risen, preheat your oven to 375°F.
step 9:
Once the oven is preheated bake for 15-20 minutes or until the rolls are golden. The bake time will be on the 15 minutes side in tin pans, and more on the 20 minute side for stoneware or cast iron pans. Remove from the oven and gently shake the rolls out of the pan. Brush with butter if desired and serve with a hearty bowl of soup.
step 10:
These rolls are best eaten fresh but will keep in a breadbox for 1-2 days. If you won’t be eating them right away, I recommend freezing them as soon as they’re cooled. Enjoy!

That’s that! How did they turn out for you? What questions do you have?
I will be continuing Sourdough Simplified in future posts. Is there anything specific you would like me to cover, or a sourdough recipe you’re hoping I’ll share?
Until next time, happy baking!
“Blessed shall be your basket and
your kneading bowl.”
more sourdough simplified…